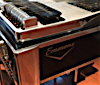
Was changing my strings today and noticed the beginning of very slight grooving on some of the changer fingers (strings 3,4,5) where the string makes contact on the top. Is there something I can do to help smooth these down a bit? If so, how?
Thanks...gregg
How to fix slight grooving on changer
Moderator: Dave Mudgett
-
Gregg Laiben

- Posts: 151
- Joined: 13 Jul 2009 7:20 am
- Location: Kansas City, Missouri, USA
- State/Province: Missouri
- Country: United States
-
Jerry Overstreet

- Posts: 14727
- Joined: 11 Jul 2000 12:01 am
- Location: Louisville
- State/Province: Kentucky
- Country: United States

I keep one of these in my seat for when I break a single string. You can also use it to wedge the string on the pin while you install a new one. If I have time, I'll buff the finger a bit before installing a new string.
For cleanup and re-stringing a new set, I use the 1" wide industrial size eraser for buffing both sets of changer fingers.
For really bad gouges, an emery board or nail file can be used but you must be really careful not to affect the machined radius of the finger. Caution there. If you have anodized or plated fingers, best to leave 'em be.
-
Paul Norman (RIP)
- Posts: 2606
- Joined: 18 Mar 2005 1:01 am
- Location: Washington, North Carolina, USA
- State/Province: Washington
- Country: United States

-
Chris Lucker
- Posts: 3165
- Joined: 11 Aug 1999 12:01 am
- Location: Los Angeles, California USA
- State/Province: California
- Country: United States
-
Fred Shannon

- Posts: 3363
- Joined: 27 Sep 2002 12:01 am
- Location: Rocking "S" Ranch, Comancheria, Texas, R.I.P.
- State/Province: -
- Country: United States
-
Philip Sterk
- Posts: 181
- Joined: 24 May 2009 11:31 am
- Location: Nashville, TN
- State/Province: Tennessee
- Country: United States
If you're going to use sandpaper or any other buffing material, may I suggest "masking" off the areas between the changer fingers and changer area in general with masking tape (preferably low tack blue or green tape). Like any buffing or painting project, one should always be mindful of the areas that are not being addressed. Clean up is always the hardest part of any project. The more you address your cleanup before you start your project, the easier it is to protect and keep your axe clean. Good luck!
-
Jerry Overstreet
- Posts: 14727
- Joined: 11 Jul 2000 12:01 am
- Location: Louisville
- State/Province: Kentucky
- Country: United States
Something I read on the Mullen site....an article about grooving the fingers by laying the guitar or bumping the changer finger radius against something hard and unforgiving.
As Del's writings reveal, protect the vital changer fingers from the strings being driven into them by anything rigid.
Chris makes an excellent point. I have a nice case from a former builder, super great guy and picker from a few years back. It does not have any blocking as it's sort of a generic fit for several guitars. The keyhead and changer lies in a nicely padded area in the bottom of the case. You can see the impression it makes quite vividly. Probably OK, but after the revelation from Del, I decided to not use it again until it is properly blocked as Chris suggests.
Last edited by Jerry Overstreet on 26 Mar 2011 2:01 am, edited 1 time in total.
-
Jonathan Cullifer
- Posts: 1132
- Joined: 30 Sep 1998 12:01 am
- Location: Gallatin, TN
- State/Province: Tennessee
- Country: United States
-
Jason Hull
- Posts: 553
- Joined: 16 Jan 2010 9:05 am
- State/Province: -
- Country: United States
-
Jack Stoner

- Posts: 22147
- Joined: 3 Dec 1999 1:01 am
- Location: Kansas City, MO
- State/Province: Kansas
- Country: United States
-
Gregg Laiben
- Posts: 151
- Joined: 13 Jul 2009 7:20 am
- Location: Kansas City, Missouri, USA
- State/Province: Missouri
- Country: United States
-
Gary Richardi
- Posts: 115
- Joined: 22 Jul 2008 12:49 pm
- Location: SoCal, USA
- State/Province: -
- Country: United States
I haven't tried these yet for this purpose but I think these Stew-Mac fret touch-up sticks would be perfect.

The 3 abrasive areas are 1200, 4000, and 12000 grit. When I had a guitar shop service, I went through a bunch of these for fret polish jobs and they are fantastic. They Stew-Mac also sells rubberized cermic fret polishing wheels for Dremel tools that I use for a brilliant shine on frets but I think that might be overkill.
The 3 abrasive areas are 1200, 4000, and 12000 grit. When I had a guitar shop service, I went through a bunch of these for fret polish jobs and they are fantastic. They Stew-Mac also sells rubberized cermic fret polishing wheels for Dremel tools that I use for a brilliant shine on frets but I think that might be overkill.
-
Jonathan Cullifer
- Posts: 1132
- Joined: 30 Sep 1998 12:01 am
- Location: Gallatin, TN
- State/Province: Tennessee
- Country: United States
-
Gregg Laiben
- Posts: 151
- Joined: 13 Jul 2009 7:20 am
- Location: Kansas City, Missouri, USA
- State/Province: Missouri
- Country: United States
-
Gary Richardi
- Posts: 115
- Joined: 22 Jul 2008 12:49 pm
- Location: SoCal, USA
- State/Province: -
- Country: United States
-
John Billings

- Posts: 9344
- Joined: 11 Jul 2002 12:01 am
- Location: Ohio, USA
- State/Province: Ohio
- Country: United States
I cut a strip of very fine emery cloth to the width of the finger, long enough to grab at each end. Mask off areas you don't want to touch, or get dust into. Grabbing on to each end of the strip, I lay it over the finger, so that it follows the curve of the finger. Pulling the emery cloth back and forth will not cause a flat spot. Use a vacuum frequently to pick up grit and dust.
-
Peter den Hartogh

- Posts: 1001
- Joined: 27 Mar 2010 12:49 pm
- Location: Cape Town, South Africa
- State/Province: -
- Country: United States
-
Larry Bell

- Posts: 5550
- Joined: 4 Aug 1998 11:00 pm
- Location: Englewood, Florida
- State/Province: Florida
- Country: United States
A Dremel with a buffing wheel and buffing compound works best for me. I have also used crocus cloth (wet/dry works ok too) and a pencil eraser. A typewriter eraser (if you can find such a thing these days) also works well.
The key is not to overdo it and, as everyone else pointed out, DON'T MESS WITH THE RADIUS OF CURVATURE.
Different brands of steel use different materials. My old Emmons and my Fessy are hard as a rock -- hardly wear at all; my Sho-Bud and ShowPro guitars both use softer material and require more attention.
Larry Bell - email: larry@larrybell.org - gigs - Home Page
My CD's: 'I've Got Friends in COLD Places' - 'Pedal Steel Guitar'
2021 Rittenberry S/D-12 8x7, 1976 Emmons S/D-12 7x6, 1969 Emmons S/D-12 6x6, 1971 Dobro, Quilter ToneBlock 202 TT-12
My CD's: 'I've Got Friends in COLD Places' - 'Pedal Steel Guitar'
2021 Rittenberry S/D-12 8x7, 1976 Emmons S/D-12 7x6, 1969 Emmons S/D-12 6x6, 1971 Dobro, Quilter ToneBlock 202 TT-12
-
Tony Glassman

- Posts: 4482
- Joined: 18 Jan 2005 1:01 am
- Location: The Great Northwest
- State/Province: -
- Country: United States
Exactly as Mike Cass instructed, when I rebuilt my P/P. I used Crocus cloth instead of 600 w/d then buffed as per the video. It worked perfectly.Peter den Hartogh wrote:http://steelguitar.com/vids/changerfingers.wmv
-
John Billings
- Posts: 9344
- Joined: 11 Jul 2002 12:01 am
- Location: Ohio, USA
- State/Province: Ohio
- Country: United States
Basically the same method as I use. But I do it without disassembling the changer, so a much shorter, and narrower, piece of emery cloth is used. And I use the crocus cloth to finish it. The crocus cloth gives such a fine finish, buffing isn't needed. At least that's been my experience. If I have the changer apart, everything gets buffed.
-
Tommy Detamore
- Posts: 1580
- Joined: 17 Dec 1999 1:01 am
- Location: Floresville, Texas
- State/Province: Texas
- Country: United States
I do the same thing. I came up with some "little helpers" to aid the process:I cut a strip of very fine emery cloth to the width of the finger, long enough to grab at each end.

The clips really help me hug the sides of the finger as I do the shoeshine motion, so as to insure that I follow the radius of the finger top as closely as possible. I put a dab of Simichrome on the paper to create a "slurry" as I sand.
Tommy Detamore
Source Audio, Goodrich Sound, and Stringjoy Authorized Dealer
www.cherryridgestudio.com
www.steelguitartracksonline.com
Source Audio, Goodrich Sound, and Stringjoy Authorized Dealer
www.cherryridgestudio.com
www.steelguitartracksonline.com
-
John Billings
- Posts: 9344
- Joined: 11 Jul 2002 12:01 am
- Location: Ohio, USA
- State/Province: Ohio
- Country: United States
-
Tommy Detamore
- Posts: 1580
- Joined: 17 Dec 1999 1:01 am
- Location: Floresville, Texas
- State/Province: Texas
- Country: United States
Thanks John! Yes, it works well for me....John Billings wrote:Good idea Tommy!
I just did this to one of my steels today and I borrowed a technique that I use when dressing frets on a guitar. I "painted" the finger tops with a Sharpie prior to sanding. This gives a pretty good visual as to how much metal you are taking off, and where the problems (grooves, etc.) lie. When you've removed the ink when sanding, then you've basically done about as much as you can do. Then it's on to using finer grits and polishing...
Tommy Detamore
Source Audio, Goodrich Sound, and Stringjoy Authorized Dealer
www.cherryridgestudio.com
www.steelguitartracksonline.com
Source Audio, Goodrich Sound, and Stringjoy Authorized Dealer
www.cherryridgestudio.com
www.steelguitartracksonline.com