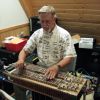
| Author |
Topic: New Sho-Bud project |
Tyler Button
From:
Arizona, USA
|
 Posted 8 Sep 2020 4:27 pm
 |
|
Hey All,
This is my first post outside of the classifieds although I've been lurking and rabbit-holeing for a bit.
I just took possession of this ol' girl (a Wonderfull 6139) who needs some love and care. There appears to be some sort of aftermarket fretboard that has also been painted, lacquer issues here and there, the internals are gummed and rusted to all get out, and there are no pedals. Which leads me to my first question.
Im fairly sure I have found a source for skinny sho-bud pedals and the pedal rods. But what kind of parts am I looking for to complete what appears to be the pedal assembly? There are holes in the pedal bar which I assume is where you install bookends for an axle that runs through the pedals?
Anyhow, I appreciate all the help, tips, and good wishes as I embark on this project and I figure I'll just keep this post up to document my progress and questions.
 |
|
|
|
Ian Worley
From:
Sacramento, CA
|
Posted 8 Sep 2020 5:00 pm
|
|
Pedal rack looks like the earlier style, which would mean the wider waffle style pedals. There would be a vertical block at each of the locations where the holes are (the "bookends" you mentioned) with the 1/2" axle spanning between them. If you do a search there are tons of pics around. The axle supports are simple enough that you could fabricate them with just a drill, a tap and some basic hand tools. The later pedal racks for the narrow pedals have extruded T-slots in the back of the rack that hold the axle mounts.
The narrow pedals will work fine but you will need to fabricate some spacers too as they are narrower on the axle. Pedal to pedal spacing on the narrow version is ~2-1/2" vs. ~2-11/16" typically for the older waffle style. You'll just want to measure the center to center spacing of the cross shafts and match that. The narrow pedals also have a vertical protrusion on top near the axle that limits the range of motion. You can compensate for this by placing the axle holes slightly lower and extended slightly toward the rear.
It would be good to see more pics of the rest of the guitar, the underside, etc. It's appears to be from around late '74 early '75, which was a transitional time at Sho-Bud, lots of different mix and match parts on Buds from that era. I'm guessing this one has a 2/1 changer and two hole pullers with set screws in the swivels. One nice thing about '70s Buds is that parts are plentiful, and Michael Yahl at PSG Parts makes beautiful replicas of many of them too. |
|
|
|
Tyler Button
From:
Arizona, USA
|
Posted 8 Sep 2020 5:23 pm
|
|
Ask and ye shall receive: Serial # 6928
PS: Thank you. All the info you gave was substantially helpful and I am grateful.
PPS: Could someone enlighten me as to what the switch does?


 |
|
|
|
Ian Worley
From:
Sacramento, CA
|
Posted 8 Sep 2020 6:14 pm
|
|
The switch is for the coil tap. The red wire from the pickup is usually the tap, it's connected to the middle of the pickup winding, so lower impedance = lower output, twangier tone vs. the full coil.
There is a list of serial numbers and mfr dates in the Sho-Bud sticky at the top of this forum section, page 11 about two-thirds of the way down.
This guitar definitely needs a full tear down and cleaning, it's been neglected. Just take lots of pictures as you go and sketch out a map of the pull rod locations in the changer and bell cranks. Take the strings off, remove the lower return springs, the rest is fairly intuitive. You can clean the metal parts with most any kind of solvent. Plain old paint thinner is a good choice, it's fairly benign to work with. Do not use gasoline, it's the opposite of benign.
When you re-assemble, the second set of lighter springs against the underside of the body are "raise helper" springs. These are optional, and can sometimes be problematic on strings that have a lower as they can affect and actually destabilize the lowering action. They don't do anything useful on strings with no raise.
One other caution, the fingers on this guitar are chrome plated. You can clean them to your heart's content, but be careful about polishing them. If really need to polish them do it only very lightly, and by hand with Simichrome or something similar. If you polish on a wheel and wear through the (thin) chrome they are toast. |
|
|
|
Tyler Button
From:
Arizona, USA
|
Posted 12 Sep 2020 3:21 pm
|
|
Welp....Tomorrow she goes under the knife. I'm having a hard time with it because I typically like to keep patina/character/signs of life in things like this. But she's broken. She's a mess.
So for both documentation AND justification purposes:
Firstly..I have to amend. This isn't an aftermarket fret board. Its a Sho-Bud dust catcher where somebody grinded down the card suits and painted it. (I have a little something up my sleeve to rescue this)

Finish issues on the wood and metal:


And mechanical issues:


Anyhow:
Wish me luck.
Godspeed. |
|
|
|
Ian Worley
From:
Sacramento, CA
|
Posted 12 Sep 2020 6:44 pm
|
|
| Patience is your friend. Good luck! |
|
|
|
Brad Issendorf
From:
Lake City, Minnesota
|
Posted 12 Sep 2020 8:01 pm
|
|
Tyler, I wish you the best. I set out to save an old Sho Bud, and did. This one was very damaged in all ways: cosmetic, electronic, and mechanically, but it truly plays as well as my other guitars. Its time consuming but well worth it.

Its not totally finished yet, but I had an opportunity to play it at a socially distant outdoor job, so i put it together and went for it. I'm glad I spent the effort, well worth it. |
|
|
|
Tyler Button
From:
Arizona, USA
|
Posted 13 Sep 2020 8:18 am
|
|
3 hours in and the first lesson I have learned is:
Like most things in life, reading about taking out the changer is far easier than ACTUALLY taking out the changer especially when the *^#%+*^%#} axel is *^%#**£ rusted in through all of the ^*%#+€~ fingers.
Hopefully Some PB blaster and time away will help. |
|
|
|
Tyler Button
From:
Arizona, USA
|
Posted 13 Sep 2020 9:12 am
|
|
SUCCESS!!! The above prescription worked (along with finding a more optimal tool to use as a punch)

ANOTHER LESSON LEARNED Should have taped everything before PB blasting the changer. I was debating whether or not to flock the undercharge but my reckless inadvertant staining here seems to have made that decision for me.

Is there a process of safely removing the label so I can readhere it later?
Also, as you can see above, I discovered a nasty split in the wood. Surprised and grateful that it didn't go through the shorter more fragile outside piece.

Lastly, what is all of this caked on chalky white stuff I'm finding everywhere?

 |
|
|
|
Tyler Button
From:
Arizona, USA
|
Posted 14 Sep 2020 10:14 am Question:
|
|
I’m having a dickens of a time getting my roller axel out. But I have this crossover that I’m gutting and it looks like this headstock will fit like for like.
So: is there a benefit to the small vs larger rollers? Grover vs Schaller tuners?
 |
|
|
|
Ian Worley
From:
Sacramento, CA
|
Posted 14 Sep 2020 11:36 am
|
|
The large rollers and axle are not stock Sho-Bud. The only real advantage to them would be if the rollers are gauged individually to accommodate the varying thicknesses of the strings. The mounting screw holes on the other key head are probably not going align perfectly either, so you may need to ream or re-drill one or more.
In the pic it looks like the center of the nut roller is offset toward the fret board to accommodate the thicker axle. Just something you should check. If so, this will affect intonation very slightly. All thing considered this is probably a fairly minor issue, but ideally you would shift the key head slightly to compensate so the overall scale is exactly 24" to sync with the fret board spacing.
You should be able to get the axle out of the original with a little patience. I would suggest remounting it on the body to give better support, put some Break-Free or similar on there to loosen the rust and use small punch or nailset to work the axle up and out from one end. You obviously need to be careful not to use too much force with the punch on the end of the axle or you will flare it out and exacerbate the problem. A little heat from a hair dryer directed onto the aluminum part only might help too. |
|
|
|
Erv Niehaus
From:
Litchfield, MN, USA
|
Posted 14 Sep 2020 11:45 am
|
|
I believe the white stuff you talked about is oxidization of the metal parts.
Erv |
|
|
|
Tony Prior
From:
Charlotte NC
|
Posted 14 Sep 2020 11:52 am
|
|
A great project .
Below is a thread from my recent SB Pro II project. Maybe there is something in there that will offer some insight.
You can tap that axle out gently from the side , soak it in lube or Break Free first.
That big crack, it may be worth looking at drilling a 1/4 or 3/8 inch hole across , placing ( gluing) a dowel in the hole and clamping it . The outside edges of the dowel stained will look nice, like furniture.
Those changer parts and springs will clean up nicely. after cleaning and scrubbing them with thinner, try a Scotch Bright Pad on the drill press to bring them back to life.
BEST to you ! Its all a labor of love ! 
https://bb.steelguitarforum.com/viewtopic.php?t=354715&highlight=sho+bud
_________________
Emmons L-II , Fender Telecasters, B-Benders
Pro Tools 12 on WIN 7 !
jobless- but not homeless- now retired 9 years
CURRENT MUSIC TRACKS AT > https://tprior2241.wixsite.com/website |
|
|
|
Tyler Button
From:
Arizona, USA
|
Posted 17 Sep 2020 10:19 am Springtime!
|
|
You know....I’ve gotten a lot of messages of “patience†both here on the forum and in private correspondence. And from that I mentally prepared myself for time in the garage feeling long and arduous.
But it’s quite the opposite. As a man with three little kids, being in garage warped time even faster cause I was so locked in on the task and reveling in the peace in quiet.
In fact, just the other morning I told my wife that I was going to head to garage and knock out the work on the springs. When I was done I came in to find that my kids had al graduated high school, my wife had taken a new husband, and the Statue of Liberty was half buried in the sand.
The only consolation is that the springs came out looking better than my wife’s new husband.

 |
|
|
|
Dave Meis
From:
Olympic Peninsula, Washington, USA
|
Posted 17 Sep 2020 11:25 am
|
|
| I tried using the longer pedals from a Pro III on my early LDG, but they wouldn't work in the LDG pedal bar... |
|
|
|
Ian Worley
From:
Sacramento, CA
|
Posted 17 Sep 2020 12:07 pm
|
|
| Dave Meis wrote: |
| I tried using the longer pedals from a Pro III on my early LDG, but they wouldn't work in the LDG pedal bar... |
If the narrow pedals are mounted in the middle of the rack like the older style, the protruding vertical nub has to be cut. On the later racks with the T-slots and narrow pedals, the axle was mounted more toward the bottom. You also need spacers on the axle as the narrow pedals are 3/16" - 1/4" narrower on the axle
 |
|
|
|
Tyler Button
From:
Arizona, USA
|
Posted 17 Sep 2020 12:40 pm
|
|
I was able to successfully procure the waffle pedals.
I’m continuing the back room and black market deals for the other parts. But I have some good leads.
If worse comes to worse there’s always the Libyans who operate out of a blue VW bus on the corner. They swear they can get me anything.
 [/b] [/b] |
|
|
|
Ian Worley
From:
Sacramento, CA
|
Posted 17 Sep 2020 1:50 pm
|
|
| Tyler Button wrote: |
| ...there’s always the Libyans who operate out of a blue VW bus on the corner. They swear they can get me anything... |
Just wear a hat and sunglasses. There are cameras everywhere these days. Maybe a fake beard
 |
|
|
|
Bob Muller
From:
Oregon, USA
|
Posted 22 Sep 2020 12:08 am Sho-Bud Restoration
|
|
Tyler
This is an LDG I cleaned up awhile back, The guitar looked real good but see what the fingers looked like when I removed them. I think you are on the right path in that everything must come apart, and be cleaned, or repaired then the guitar will play like new again. Just think how much you will learn by doing this.
https://bb.steelguitarforum.com/viewtopic.php?t=339225&highlight= |
|
|
|
Tyler Button
From:
Arizona, USA
|
Posted 26 Sep 2020 6:36 am Welp, you can’t polish a turd
|
|
Spent a bunch of time polishing up the endcaps and what I thought would just polish out was permanent degradation of the finish. The front of this thing makes me think it may have been owned by Pete Townsend. (Last picture is of the back side for comparison).


So I imagine my options are as follows:
1: welp, I cleaned her up best I could. Her blemishes and age are part of her charm.
2: Find replacements
3: replating?
4: paint them (I’m sure this is blasphemous, but an option is an option) |
|
|
|
Skip Edwards
From:
LA,CA
|
Posted 26 Sep 2020 7:12 am
|
|
You did a good job of polishing the end plates. From the pictures it looks like the end plates are the least of your problems.
Don't paint them...
JMHO...
Good luck. |
|
|
|
Erv Niehaus
From:
Litchfield, MN, USA
|
Posted 26 Sep 2020 7:13 am
|
|
The endcaps are not plated.
They are polished aluminum.
To do a thorough job, you need something like this.
 |
|
|
|
Tyler Button
From:
Arizona, USA
|
Posted 26 Sep 2020 7:35 am
|
|
Well alrighty then.
In one of the big restoration threads it said not to use machinery because it would bust through the finish (more specifically create “millions of pinholesâ€). So when I saw it was bust anyway I brought out my car polishing equipment.
But I guess we’re going back to the bench. |
|
|
|
Erv Niehaus
From:
Litchfield, MN, USA
|
Posted 26 Sep 2020 7:37 am
|
|
Tyler,
Just goes to show you can't believe everything you read. 
Erv |
|
|
|
Ian Worley
From:
Sacramento, CA
|
Posted 26 Sep 2020 12:02 pm
|
|
The discoloration is water staining. This guitar has obviously gotten really wet at some point in its past based on the pics you've posted. Aluminum will react chemically to the dissolved stuff that's typically present in water, particularly alkalines, lime, calcium. You can try a weak acid like white vinegar, see if that helps, but the stains are probably more than "skin deep" so just cleaning and polishing the surface probably won't be enough to cut through it.
The idea that you shouldn't use machinery to polish the exposed metal parts is silly, as Erv suggest, just ignore that. All the exposed cast parts were sufaced and polished on machinery when they were made, they didn't just pop out of the mold all smooth and shiny. But just polishing is not necessarily going to do what you need. Whatever work you do to surface and finish a cast piece of metal is a gamble, even on a brand new part. You could try sanding it down a bit with some 320 or 400 to take off a more significant amount of the surface, then work your way gradually down to 1500 or so before polishing on a wheel. By then you would be able to see if you've cut through the stain. You might also expose some casting bubbles (the pinholes you mentioned) and still end up with no measurable improvement in the staining.
There is a guy on ebay who sell NOS Bud parts, including end plate sets for about $180. Given the relative condition of everything else on this guitar though, I'm not sure that is good investment. If it was mine I would just clean, repair and restore what you have the best you can and just enjoy the guitar for what it is, with all it's cosmetic imperfections. |
|
|
|